Custom Search

Aug 26, 2009

Remove the Content Advisor and Ratings Password

If you have forgotten the Internet Explorer content advisor password and want to change the ratings settings then follow these instructions to change the settings back to their defaults.

All the Content Advisor settings are stored in the key below. If you no longer have the password, then simply delete the key, and all the settings will be removed.

Open your registry and find the key below. Single click on the key to highlight it, press the DELETE key, or alternatively select Delete from the Edit menu.

Close Internet Explorer, re-open it, and the Content Advisor feature should now be disabled.


User Key: [HKEY_CURRENT_USER\SOFTWARE\Microsoft\Windows\CurrentVersion\Policies\
Ratings]
System Key: [HKEY_LOCAL_MACHINE\SOFTWARE\Microsoft\Windows\CurrentVersion\Policies\
Ratings]


Please leave me comments. Let me know if this worked for you, or if you notice something that needs to be changed. Use the Tell&Share icon under the title of the post to share it with your friends or digg it!

Aug 16, 2009

Insignia NS-4V24 Teardown


You are looking at an Insignia NS-4V24 mp3 player.
This MP3 player would only turn on when a USB cable was inserted. I bricked it after I stupidly followed the advice of a BestBuy rep and attempted to format the flash memory to reset all configuration settings. I decided to tear it apart and posted the pictures here. Overall, I think this MP3 player is an iPod killer. It supports 8GB SDHC cards, it has a built in FM tuner, it supports wireless bluetooth headsets, plays videos, and has a nice 2.4" LCD.

Click on the images to enlarge them.


Jul 10, 2009

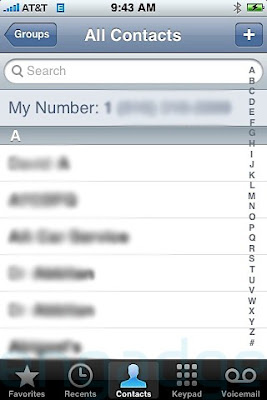
iPhone Contacts in Exchange - How to hide certain contact groups.

One of the issues I recently ran into was trying to hide certain contact lists from the iPhone's contact manager.

The iPhone does not allow you to 'select' which contact groups to synchronize. It is configured to 'hunt' for contact folders throughout your entire mailbox tree and then makes everything available. For those of you that have thousands of contacts, this solution might work for you.


1) Create a Contacts folder in the Public Folders database of Exchange. You can use Outlook to do this or the Exchange System manager.

2) Change the permissions for the newly created folder so that "Default" and "Anonymous" have no access. Set them to "none". Uncheck "Folder Visible" for Default and Anonymous. You can do this by right clicking on the Public Folder, properties, then permissions. Make sure that you are set as the Owner of the folder.

3) Move the Contact lists that you want to hide from your iPhone into this newly created Contact folder. Since this new folder is located in the "Public Folders" database of the Exchange server, it won't synchronize to your iPhone.

If you set up the permissions correctly, this contact list will be visible only to you, and your iPhone won't see it.

Note that you may have to disable Contacts in your iPhone's Exchange account settings to clear the contacts, and then re-enable it to refresh it.

Good luck.


Please leave me comments. Let me know if this worked for you, or if you notice something that needs to be changed. Use the Tell&Share icon under the title of the post to share it with your friends or digg it!

Apr 17, 2009

How to block google chat in igoogle.com

Recently, I found out that Google did not provide a mechanism for blocking google chat in igoogle.com like it does for gmail chat.

To block gmail chat, you simply configure your firewall/proxy to block requests to/from 209.85.201.189 which corresponds to http://chatenabled.mail.google.com

There is no such mechanism for igoogle.com chat. In fact, igoogle.com redirects to http://www.google.com/ig/ which meant that blocking igoogle.com as a domain would not do the trick. Users could still go directly to www.google.com/ig/ and access chat.

Today, I accidentally ran across a solution.

To successfully block the chat feature of igoogle.com you need to block access to the following URL.


I used special URL filtering software to block any requests sent to "talkgadget.google.com".

You can do the same using windows default HOSTS file by redirecting talkgadget.google.com to 127.0.0.1 or using a proxy that filters out this domain.

The result is access to igoogle.com and all other google features, but with chat disabled!


Please leave me comments. Let me know if this worked for you, or if you notice something that needs to be changed. Use the Tell&Share icon under the title of the post to share it with your friends or digg it!

Mar 20, 2009

Capture login time / logout time for users on any Windows PC using simple scripts

The following scripts can be used to track user login/logout activity on workstations or terminal servers. I have it set up to track just one PC, but you could easily adapt this script to monitor multiple workstations by removing the IF statement after "Set THENetwork . . . " line. If you do this, please do not forget to remove the "End IF" statement as well.

You need to personalize the BOLD/ITALIC statements to your environment.

I used a GPO to run these scripts at logon and logoff in our domain. I suggest you do the same. You need to create a network location that is accessible by everyone. You can set the folder permission to allow write but only allow administrators to list/read the location.

The output files are Comma Separated and can be easily opened by Microsoft Excel.


LoginReport.vbs

START SOURCE CODE

WriteLineToFile()

Function WriteLineToFile
Const ForReading = 1, ForWriting = 2, ForAppending = 8
Set THENetwork = WScript.CreateObject("WScript.Network")
IF (THENetwork.ComputerName = "CHANGE THIS TO THE COMPUTER YOU ARE MONITORING") Then
filename = "OUTPUT LOCATION" & THENetwork.UserName & ".csv"
Dim fso, f
Set fso = CreateObject("Scripting.FileSystemObject")
Set f = fso.OpenTextFile(filename, ForAppending, True)
qMark = Unescape("%22")
coma = Unescape("%2C")
today = date()
curTime = Time
username = THENetwork.UserName
computername = THENetwork.ComputerName
f.Writeline()
f.Write qMark & today & qMark & coma
f.Write qMark & username & qMark & coma
f.Write qMark & computername & qMark & coma
f.Write qMark & curTime & qMark & coma
Set f = fso.OpenTextFile(filename, ForReading)
WriteLineToFile = f.ReadAll
End IF
End Function

END SOURCE CODE


logoutReport.vbs

START SOURCE CODE

WriteLineToFile()

Function WriteLineToFile
Const ForReading = 1, ForWriting = 2, ForAppending = 8
Set THENetwork = WScript.CreateObject("WScript.Network")
IF (THENetwork.ComputerName = "CHANGE THIS TO THE COMPUTER YOU ARE MONITORING") Then
filename = "OUTPUT LOCATION" & THENetwork.UserName & ".csv"
Dim fso, f
Set fso = CreateObject("Scripting.FileSystemObject")
Set f = fso.OpenTextFile(filename, ForAppending, True)
qMark = Unescape("%22")
coma = Unescape("%2C")
today = date()
curTime = Time
username = THENetwork.UserName
computername = THENetwork.ComputerName
f.write qMark & curTime & qMark & coma
Set f = fso.OpenTextFile(filename, ForReading)
WriteLineToFile = f.ReadAll
End IF
End Function

END SOURCE CODE


Please leave me comments. Let me know if this worked for you, or if you notice something that needs to be changed. Use the Tell&Share icon under the title of the post to share it with your friends or digg it!
Mar 18, 2009

Can't remove additional Outlook mailboxes


USE THE REGISTRY EDITOR AT YOUR OWN RISK! YOU HAVE BEEN WARNED!

Here are the basic steps I used to correct the issue:

1) Run regedit to edit your windows registry.

2) Locate HKCU\Software\Microsoft\Windows NT\CurrentVersion\Windows Messaging Subsystem\Profiles\"Your outlook Profile"

3) Click on each sub-folder and open the 001f3001 keys to determine which folders are associated with each additional mailbox.

4) It's easy to spot the 'dangling' mailbox since you'll be able to spot the user's mailbox name in the registry key.

5) BEFORE PROCEEDING: I would backup the HKCU\Software\Microsoft\Windows NT\CurrentVersion\Windows Messaging Subsystem\Profiles\"Your outlook Profile" keys by exporting them to a safe location.

5) Delete the entire sub-folder of the key.

6) Re-Load outlook and the 'dangling' mailboxes should now be gone.


Please leave me comments. Let me know if this worked for you, or if you notice something that needs to be changed. Use the Tell&Share icon under the title of the post to share it with your friends or digg it!